Sunday, September 18, 2011

Goose Mousse with Cherry

This recipe is a fantastic meld of flavors, perfect for a fall appetizer.  The delicate flavor of the goose liver is complemented by hints of cherry and the coarsely chopped goose meat, which is a very rich poultry.  We raised our geese outside with none of the force feeding techniques required for a true fois gras. As a result the fat content on the liver is a bit lower, but they are still delicate, mild and delicious. The goose tenderloins were removed from breasts used for Goose Proscuitto and are the loose thin strips that separate easily from the main breast meat.  This is the most tender cut from a bird.

The recipe should take about 30-45 minutes to prepare and is best made a day in advance of serving so the flavors can meld and develop and the mousse can solidify.  The recipe calls for lard for sauteing, which can easily be substituted with butter.  Our lard comes from our Ossabaw Island Pigs and is a bit healthier than butter due to the higher percentage of unsaturated fats, not to mention it is more stable at high temperatures as there are no milk solids to burn.  I can't speak for lard from the supermarket as I've never tried it, but from the Ossabaw Island Pig it's delicious.


12 oz. Goose Liver or Fois Gras
4 Goose Tenderloins or 2 oz Goose Meat
8 Oz. Butter (One Stick, Room Temperature)
4 Tbs Lard or Butter
2 Shallots
1/4 Cup Dried Cherries
1/2 Cup Sherry
1/2 Cup Heavy Cream
1 tsp. Salt
Pepper to taste

  1. Soak the cherries in sherry for a minimum of 2 hours.  Drain the cherries and reserve the sherry in a small bowl. Squeeze the cherries to remove as much liquid as possible.
  2. Dice shallots and saute in medium heat in 1 tsp lard until translucent.  Scoop out cooked shallots and transfer to food processor. 
  3. Add 1 tsp lard to the pan and saute goose tenderloins until lightly browned and cooked through, but still moist – about 3 to 5 minutes.  Set the tenderloins aside to cool. 
  4. Add the remaining lard and saute the goose liver for 5 minutes, turning half way through.  Remove the livers and set aside to cool to room temperature or place in fridge. 
  5. Pour the reserved sherry into the pan and scrape up the drippings.   Reduce slightly, but don’t burn off all of the alcohol and pour back into the bowl.  You can also deglaze the pan in ½ the sherry and reserve the remaining amount at full strength.
  6. Add the livers and butter to shallots in the food processor and pulse, adding the reserve sherry mix and cream until light and fluffy.  Add salt and pepper to taste.  Make sure all of the ingredients are room temperature, otherwise the butter may melt and separate later.  
  7. Coarsely chop the cherries and the tenderloin and add to the food processor.  Pulse for 1-2 seconds to work in to the mousse, but no longer.  Ideally, you should have small bits of cherry and meat that add a hint of texture to the spread.
  8. Transfer the mousse to ramekins or small bowls and refrigerate.  Extra ramekins can be frozen for later use.
  9. Serve chilled with crackers.

Friday, April 15, 2011

Up in Smoke - Charcutapalooza Challenge 4

The Smoke Challenge for Charcutapalooza ended up being a ton of fun and produced some fantastic flavors. In the brining challenge last month, I did a taste comparison of pork and beef using both a corning preparation and a goose fat confit technique.  My conclusion is that the confit produced a far superior experience and although the corned beef was very tasty, the confit disappeared immediately.  

Confit of Pork Shoulder and Beef Brisket
When the smoke challenge came out, that was the kick to take the experience to a new level.  The corned beef and pork went on the smoker for about 7 hours at 180 degrees, transforming them to pastrami and what turned out to be the best pulled pork of my life.

Smoking the Brined Meat (before spices)
After smoking, the meat rested for a day and was simmered in an inch of water for 4-5 hours, flipping once.

Hot Smoked Pork (left) and Beef Brisket (right)
It's pretty amazing how the color transformed during the final cooking step.  The leftover juices were used as a base for baked beans and added a great depth to the dish.

Pastrami (Brisket, Corned, Spiced & Smoked)
 The Brisket ended up being the superstar of the competition.  A thinly sliced bite was an explosion of complex flavors, unraveling the sweet, spice, salt and smoke flavors from the super tender meat.  The pork was as good as it gets in the barbecue world and the pulled pork sandwiches were contenders for any roadside or old school joint.

As a side benefit, I smoked the home cured brown sugar bacon at the same time.

Home Cured Smoked Bacon

Sunday, March 27, 2011

Potatoes and Peas are in

The garden section planting began yesterday.  This is the area we recently cleared and the pigs grazed on last year.  They did a good job cleaning up invasive plants.  Tilling was very smooth and the bedding and manure from the animals left a rich soil behind. Potatoes, Peas and early crops are going in this spot.


Last week we finished burning the brush from the two large pine trees that were overhanging this spot and the Russian olives that had overtaken the area.  The coals and ash were spread out before tilling, which should be a beneficial additive to for the potatoes.


The Potatoes were the first priority to get in the ground.  They've been greening up for about three weeks to break dormancy and stimulate the growth of sprouts before they go in the ground.  The varieties we're planting this year are:

  • Kennebec
  • Yukon Gold
  • Irish Cobbler
  • Adirondack Red
  • Adirondack Blue
  • Red Pontiac

Two 50' rows of Wando Peas  went in to the right of the potatoes.  It's very tempting to companion plant in between the potato rows, but last year the dense planting strategy ended up being very difficult to maintain and we're going to keep things spread out and mulched this year.

38 Pounds of Seed Potatoesaa
We're starting this next stretch under row cover with six foot metal hoops for frost and pest protection.  The furrower attachment on the tiller was used to clear the trench for the hoops and spread out the dirt for laying on the fabric to secure it.  A variety of early vegetables will go in this spot.

Saturday, March 19, 2011

Spring Chicks

The weather has been beautiful the last few days - perfect for the arrival of our spring broilers.  We got a batch of 100 Cornish Cross chickens from Purely Poultry, whom I've found to be very reliable and one of the best deals on broilers on a small scale.  We also get a discount because we're repeat customers.

Cute fuzz balls on arrival
Chickens and other poultry can be shipped when they are a day old because right before they hatch, they suck up the extra fluids in the egg and have enough protein, fat and water to last three days before they need replenishment.  This provides enough of a window to priority ship the birds to the farm.  The hatchery usually adds a couple extra birds because there are generally a couple birds that die during shipment.  Surprisingly, all 104 chicks survived the trip and were particularly perky, so we're off to a strong start with this batch.

Jayla loading chicks in the brooder
They spend two to three weeks in the brooder, then they're off to pasture where they supplement their diet with grass & bugs.  That should be just in time for the arrival of our Guineas and Muscovy Ducks, which will go through a similar process.

Friday, March 18, 2011

Seed Starting

The seed flats are starting to really spread out.  Last count we're up to 21 trays that we've reasonably timed for placing outside, not including the six varieties of Potatoes we're greening up before planting next week.  This is the most prepared we've ever been for the garden and I'm hoping we can produce a larger yield to share with friends and family with less routine maintenance.  We're also using Quick Hoops for the first time, which will really give us a boost with an early start from frost protection and later on significant pest control.  Last year we lost 75% of the squash and melon plants due to squash beetles, which the row covers should help with.

The peppers we started in late December didn't germinate well, so I have a fresh batch I'm trying before I break down and buy plants from the store.  The quick hoop bender and row cover arrived this week as well, so the planting is about to begin.  Last year was a bit of an anomaly with the last frost on May 15, but I'm planning on May 1 as the safe frost free date.

Seed flats with southwest exposure
Years ago I read about soil blocking in Eliot Coleman's "The New Organic Grower" and I purchased a micro and a medium blocker this year.  I'm really enjoying this process over using plastic pots.  It's much more flexible and there's far less plastic waste.

Soil Blockers

The micro blocker is really neat because it sets 20 3/4" blocks in a group, fitting 300 blocks in a single tray.  That's a lot of seeds on small real estate and I'm testing several varieties inside that I would ordinarily sow outside, which should help out a ton with weed control.  Last year I tilled in the entire parsnip crop because the weeds took over so badly.  Giving the crop a head start makes a huge difference.

300 spots for Lettuce, Tomatoes, Broccoli and Cauliflower
I was a little hesitant with the micro blocks because you simply drop the seed on top of the tiny little piece of dirt and I wasn't sure how germination would go.  So far I'm very encouraged and the only issue I've run into is the cat walking through the seed flats and making a general mess.  The turnips are sprouting after only three or four days and I'm delighted that I can get them in the ground properly spaced and mulched all in one shot.

Tuesday, March 15, 2011

Exploring Brining - Charcutepalooza Challenge 3

The third Charcutepalooza challenge was focused on brining.  I had never brined anything before, so this challenge was some new territory.  My perspective on brining was that it was something the meat industry did to mask inferior tasting meats and add weight to get a better price for Thanksgiving Turkeys. After getting excited about a couple recipes however, I was ready to dive in and explore the technique.

Chicken with Garlic Pepper Rub
The first dabble at it was barbecued baby back ribs and chicken.  The challenge I've had with homemade ribs is that they often end up tough, dry or charred when just grilling them.  The alternative has been to tent them in foil and slow cook them in the oven before putting them on the grill.  This steaming softens them up, but it's usually too much and the ribs don't hold together enough and can end up bland.  Brining them for an hour not only struck the perfect balance in texture, but introduced a depth of flavor that was stunning.

The brine was very basic:
  • 1 Gallon Water
  • 1/2 cup Kosher Salt
  • 2/3 cup Brown Sugar
The ribs and chicken cold soaked for an hour and were set out for another hour before grilling.  I made a rub out of several spices, which I have a feel for rather than a specific recipe.  Generally, I add
  • Healthy handful of Garlic Powder
  • Kosher Salt
  • White Pepper
  • Black Pepper
  • Dried Onion Flakes
  • Paprika
  • Chipotle Powder
  • Other stuff to suit the mood

  • Brined Chicken & Ribs
The barbecue sauce is homemade from the garden.  I discovered a neat trick with making barbecue sauce last year by drying some tomatoes before adding them to the sauce, which gives it a deep tomato taste and makes it nice and thick without overcooking.


Second Experiment 

The next brining exploration was an herb brined & roasted chicken.  

Store Bought "Chicken"
Honestly, the jury is still out on this one.  We raise our own chickens and they are delectable and moist right out of the oven.  The brining ended up imparting a pleasant herb flavor into the meat, but it was also very salty. I may play around with the concentration and time, but it's really hard to compete with our fresh chickens.  Here's the recipe for the herb brined chicken:

The Brine:
Brine mixture
  • 1 Quart Water
  • 1 Cup Kosher Salt
  • 1/3 Cup Sugar
  • 1 Tbs Tarragon
  • 2 Tbs Oregano
  • 3 Bay Leaves
  • 2 tsp Lemon Rind
  • 6 Juniper Berries
  • 1 Onion
  • 1 Head of Garlic, Cloves Split
  • 3 Quarts Water & Ice

Simmer the Brine ingredients in 1 Quart Water for 15 minutes.  There's no need to peel the garlic or onion.  Fill one quart measuring cup with ice, fill with water and repeat 2 more times to bring liquid to one gallon.  If cool to touch, place chicken in the brine and refrigerate overnight, otherwise chill the brine first.  Remove chicken 3-4 hours in advance of cooking, rinse, pat dry and refrigerate until cooking time.  Place in 375 degree oven until done.

The real test for me with a roasted bird is the quality of the gravy.  Again, the gravy was better than I've had in any restaurant, but a bit too salty.


Herb Brined Chicken with Candied Carrots
Final Brining Experiment

The final experiment is a taste off between Beef and Pork, cooked two different ways, for a four dish meal - foodies salivate.  Since the Charcutepalooza challenge is to make a corned beef, why not also try the technique on a hunk of pork along with a beef brisket?  I've also become a big fan of confit and happen to have a significant amount of goose fat waiting for a job, so why not try out a beef confit along the pork confit I've been planning and see how the techniques differ?

Pork shoulder for Salt Pork, Pork Prosciutto, and "Corned Pork"
Once the pork shoulder and the beef brisket were split up, both went into respective cures together.  The Brine and Pickling spice recipe for the Corned Beef (and Pork) came right out of Charcuterie, except I added juniper berries to the pickling spice.

Pork Shoulder and Beef Brisket curing for confit
The dry cure for the confit came straight out of the Pork Confit recipe in Charcuterie.  I need to schedule a tasting event for the final products, but can't wait to see how the techniques and character of the different meats play out.  Almost forgot, the extra hunk of pork shoulder is curing in the fridge to make a sweet salt pork.

Saturday, March 5, 2011

Pigatiller

A couple weeks ago I set some of the Ossabaw Island Pigs loose on the garden. Pigs are natural rooters and we've been using them to help prep the garden for spring for the last two years. They turn over the first couple inches looking for roots, grubs and other foods - natural rototillers; or Pigatillers.  The leftover plant material from the previous year and the early spring weeds get turned over while I'm inside keeping warm.  They also leave wonderful fertilizer in their wake, which is much easier than spreading it yourself.


In this picture you can see the early weeds sprouting to the right and the fresh look under the pigs.  Since all but the top couple inches are turned over in this process, it is very good approach for maintaining the subsoil structure that is so helpful in long term soil health.  Tilling down six inches is pretty damaging to the worms and other beneficial creatures in the earth.


The final benefit is the pigs dig to the last inch in the garden.  Running a heavy duty tiller along a fence line is nerve racking and I've had more than a couple rough moments when the tines get caught in the wire on a tight turn.  The pigs are much more thorough and I don't need to worry about fence repair or untangling the tiller tines.


The main issue with using the pigs in the garden is keeping them in too long.  Once they've turned over the soil, their running around compacts the earth and you need to go back in to till it up for planting, which offsets some of the benefits.  This year, we're planning to keep them on a short leash and move them out while the soil is still fluffy.

Tuesday, February 15, 2011

Cured Salmon - Charcutepalooza Challenge 2

The second challenge in the Charcutepalooza competition was a further exploration of the salt cure.  I had my heart set on a pancetta and guanciale from the Ossabaw Island Hog that I have ready to go.  Fortunately for Sauage (the Pig) and unfortunately for Mrs. Wheelbarrow, the hog was given a stay of execution due to extensive business travel on my part.

Freddy & Daphne (That's right - Scooby Doo)
Of course this isn't a picture of Sausage, rather Daphne, who is one of our breeders for the Ossabaws.  (Sausage didn't care for a photo in January).  So after a long day at work I stopped and purchased a package of Steelhead Salmon for dinner and reserved a fillet for curing (OMG - Farmer John actually bought animal protein- no no no).  This leads us to the Salmon masterpiece for the Charcutepalooza challenge.  

Salmon & cure mixture
One of the tips I picked up from Charcuterie was adjusting the proportion of salt and sugar.  I've made Gravalox several times in the past where I've used a 50/50 mix of salt and sugar, but Michael & Brian have a much higher sugar content in their salmon cure.  The result is that more of the salmon flavor comes out in the final product.  I'm also terribly allergic to brandy, which is traditionally used and a light whiskey is a reasonable substitute.  Here's the final recipe that I used:

6 oz Kosher Salt
7 oz Table Sugar (Sucrose)
6 oz Brown Sugar
2 TBS Coarsely Ground Black Pepper
1 TBS Fennel Seed
1 TBS Dill Weed 
1/2 cup Canadian Club Whiskey
2 to 4 pound Salmon Filet

Salmon with Curing Mix
Rinse the Salmon with water and pat dry.  Mix the other ingredients in bowl with fork until pasty.  Slather all surfaces of Salmon with cure mix & cover with Saran Wrap.  Add weight on top of salmon and refrigerate for five to seven days, turning salmon every one to two days.  After curing, rinse with water, pat dry and slice thin for serving.  Can be stored in refrigerator for several weeks.

Weight on Salmon

After weighting, the salmon will release liquid into the cure mix, which is part of the osmosis process involved in curing and the compression from the added weight.  The net result is that liquid is added to the pan, which can spill over.  That's why the whole contraption is placed on a cookie sheet.

After curing, the salmon can be cut into thin slices and served with crackers, bagels, and of course displayed in mouth watering shots like the one below.

Mouth watering display of cured salmon and goose prosciutto
Did I mention that the salmon is mouth watering - and yummy to boot?


Cured Salmon - Charcutepalooza Challenge 2 on Punk Domestics

Saturday, February 12, 2011

Brewing Update

The first keg has been tapped from our monster brewing session over the holidays.  This is the "Light" beer we created from the second portion of the Parti Gyle run.  It tastes like a combination of a pub style English Bitter and a light stout.  A touch of Chocolate malt is what gives it the black color without overpowering.  The bittering hops are pretty strong and it has just a touch of hop aroma.  I'm really pleased to see the head development on this one - a nice silky foam that you usually find in an authentic pub drawn beer.  I think I'll call this one Black & Bitter.

Monday, February 7, 2011

Getting the Garden in Gear

The first peppers are sprouting!  This is my (new) early warning system to get moving on the rest of the garden plans.  Peppers are one of the most frustrating plants to start from seed.  The garden shops make it seem easy when you pick up a six pack of young plants (like they just jump out of the potting soil), but there are few things as dull as waiting the six to eight weeks to watch a pepper plant sprout.  I usually wait a little too long in the season to get the seed flats started and then get overexcited and plant a whole bunch of vegetables at once, and of course everything takes off except the peppers.  By the time they are ready to harden outside the sun scorches them to nothing.

Early Jalapeños
This year I got the jump and started them on New Year's weekend.  I figured it would be mid to late March by the time they were nice and leafy.  The row covers (and maybe hoop-house) should provide the freeze protection for the plants at that stage.  Now I just need to get the orders in for the covers and the rest of the seeds, start the rest of the early plants, rotate the pigs to till the garden, etc......

72 Pepper Plants?

Now what would I need with 72 pepper plants and 12 varieties?  What not is the better question.  They make you smile, drool, wince, cry, burn, sweat, and scream.  The hot ones are also good for bug control aside from awesome Salsa (check out my natural bug spray recipe).  They're going to be beautiful with the 72 tomato plants that I'll be starting in the next couple weeks.

Take note of my new labeling system.  It's from plastic pipe hanger.  I had a 100' roll lying around that cost a couple bucks - a whole lot cheaper than the arrow planter labels that cost a couple buck / dozen and always seem to disappear.  So far the sharpie ink is holding up well and I haven't noticed any fading.  Now I need an inexpensive outside labeling system that can hold up to sun bleaching.  Ideas appreciated.

Sunday, February 6, 2011

First Piglets

Our first piglets born on the farm were delivered this week.  Our adult Ossabaw Island Sow (Daphne) had four healthy piglets on Wednesday and they are all doing fantastic.  There are two color variations with the Ossabaws - Black and varied color.  We got three black and one multicolored piglet this time.


Four is a pretty small litter for pigs, but the Ossabaws throw pretty small numbers compared to the refined breeds that can easily produce over ten piglets in a litter.  This is due to the fact that the Ossabaw Island breed has been genetically isolated for 500 years and adapted to some pretty harsh conditions on the island.  I'm hoping to get slightly better numbers in warmer weather, however.


The Ossabaws are very hearty and don't need a lot of extra shelter.  The shed in the background was crushed in the blizzard last year, but the pigs aren't very picky on aesthetics.  Some dry hay and a little tarp covering and they are good to go.

Sunday, January 30, 2011

Goose Prosciutto: Charcutepalooza - Challenge 1

I was very excited to stumble across the Charcutepalooza challenge a couple weeks ago and somehow manage to slide in my blog at the last minute.  Since we started raising heritage pigs two years ago in an effort to rediscover the lost taste of pork, I have been seeking out resources on artisanal and traditional uses of the animal.  One of the best is the book "Charcuterie", by Michael Ruhlman & Brian Polcyn. When I saw the cooking / blogging competition at Mrs Wheelbarrow's Kitchen based on this book I couldn't resist testing out the blend of my farming and culinary interests.  As much as possible I will be using meats that we raise on our property for the project.  We'll see how practical that is, but if I can pull it off with a few of our own animals it would be fantastic.

Goose in Center for Proscuitto
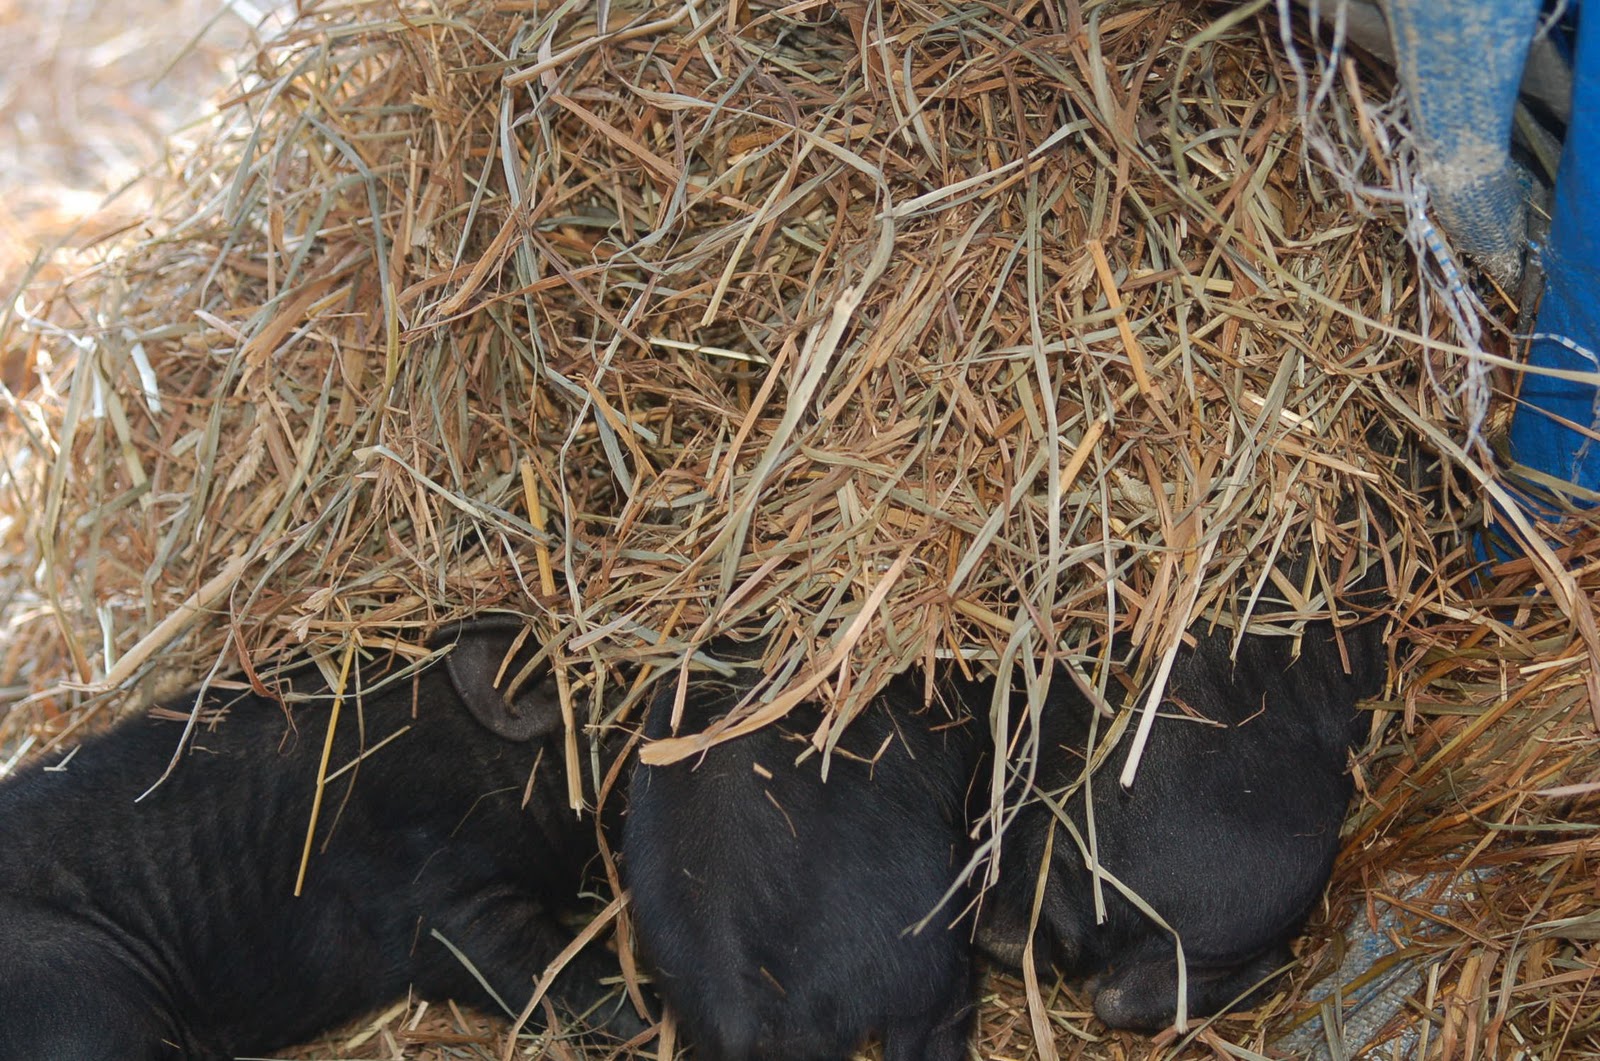
The fist of twelve challenges is duck prosciutto, which is a straightforward salt cured dish that is very good as  a start to curing at home.  Luck has it that I didn't have duck on hand (we will be raising Muscovies in 2011), but we did happen to have some geese that we raised for the holiday season.  Geese have proven to be easy and inexpensive to raise, as they graze on grass and weeds and pretty much take care of themselves.  But don't let their photogenic pastoral beauty fool you - they are monsters when they chase the kids around the property and leave a horrifying mess in the most inconvenient of places.

Cleaned & Ready for Creativity
The elegant depth of a well prepared goose is hard to pass up, however.  The stuffed holiday goose was fantastic and we also just finished a goose confit that was mind blowing.  Plucking and cleaning a goose is a rather steep commitment, so I like to make sure the final dish is one to be memorable. So off we go to the recipe.


Ready to Go

First the breasts are carefully removed, which will be used for the main dish.  The thighs and legs are cut away for confit and the rest of the parts will be used for stock.  Goose makes a wonderful silky stock that adds a delicate richness to certain soups that is hard to achieve with chicken.  There's a fair amount of fat left on the carcass, which I will render from the stock pot and use for confit and pan frying.


Basic Salt Curing


Next, the breasts are covered in Kosher salt and refrigerated for 24 hours.


Salted Goose Breast


After 24 hours, the goose breasts are rinsed with water, patted dry, seasoned and wrapped in cheesecloth for drying.  One of the breasts was covered with white pepper, which is straight from the duck prosciutto recipe in "Charcuterie".  The second was covered with a mix of white pepper, juniper berries, thyme and cracked black peppercorns.


Salt & Sugar Cured Salmon
As a side note, being a bit of an efficiency freak when it comes to food, I dropped a salmon fillet I had on hand into the remaining salt cure and topped it off with some additional salt, dill, table sugar and brown sugar.  These are the basic ingredients I use for Gravlax minus the brandy (which I'm terribly allergic to).  I also took a tip from Michael on this recipe as well and doubled the amount of sugar I typically use.


Hanging to Dry
Back to the goose. After the goose breast was seasoned and wrapped in cheesecloth, they were hung in our pantry, which is semi unheated.  It is attached to our kitchen, but doesn't have a heat source and sits on stilts, so it get's cold when closed off.  The conditions there aren't ideal, but are the best in the house.  My estimate is the temperature fluctuated between the low 40s and high 50s during the drying process.  It was also drier than ideal, but the goose didn't seem to mind and it came out very well.


Goose Prosciutto
The goose had a huge layer of fat and was quite a bit thicker than duck, so I let it dry a few extra days.  At day 12 it was ready to pull down and use.  The extra time added a crust to the meat side of the breast, but wrapping it in plastic softened it up quite a bit and it sliced beautifully.  I can't wait for book club tonight where I'll be serving a platter of homemade charcuterie including the goose prosciutto, cured salmon, venison chorizo and goose rillettes.
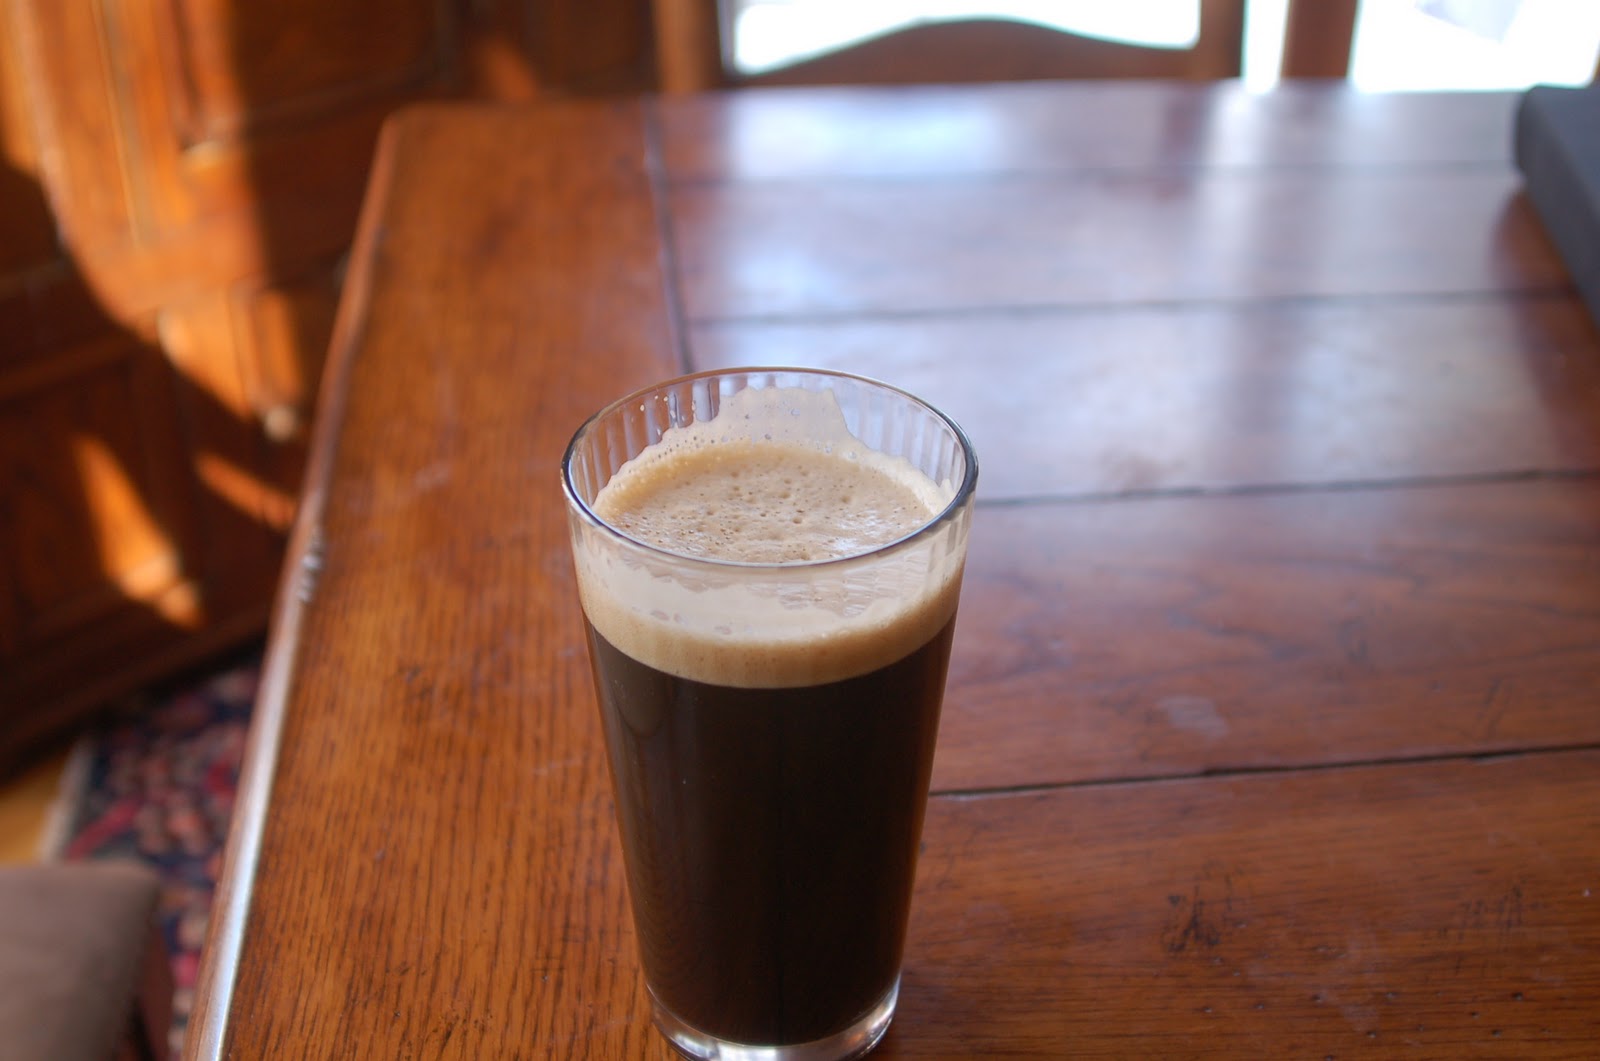


Goos  Prosciutto: Charcutepalooza on Punk Domestics


Saturday, January 15, 2011

Brew Day

All-grain brewing can be an intense experience, both for the amount of time dedicated to do it well and the equipment required to handle large amounts of wet sticky malt.  Having a proper setup for brewing has been a goal of mine for many years and over the holidays I got the workshop (which has been a storage area for the last four years) setup for brewing.  That included running a bunch of plumbing, installing a cheap sink in the workshop bench and cleaning up the equipment I've been pulling together for years.  This setup will also be really handy with seed starting for the garden.  Brewing is a really good male bonding experience and I had my friends Jim and Brian over to do the hard work.

When doing all-grain mash, I usually do a Parti-Gyle technique, where the initial runnings from the malt make a strong beer (in this case a Belgian style Dubbel) and the secondary runnings make a weaker table beer (a Black English style Ale).  Start time was around 10:00am, but we had a bit of organizing and prep work before dough-in at about 12:00.

Brian Grinding Grain
For the mash we used 55 lbs of Maris Otter malt, 7.5 lbs White Wheat, 5 lbs Special B, and 7 lbs CaraMunich - a total of about 75 lbs of grain!  Mashing is a pretty sensitive process, which involves mixing the grain with water and progressing the temperature through several stages in order to break down the sugar chains for yeast digestion (I won't bore you with the technical details).

Jim stirring the first Decoction
We did a Decoction Mash, which entails removing a portion of the mash, boiling it and returning it to the main mash kettle to heat it up.  Surprisingly we nailed the temperature steps for every stage.  After the steps are done, you rinse the grain and collect the syrup for Wort (the makings of beer).


The Sparge
While Jim was delicately cooking the mash, Brian was off to the kitchen to make 5 lbs of Belgian Candy sugar.  This is a very common ingredient in certain Belgian beer recipes and is very expensive to buy off the shelf, but pretty easy to make.  It's essentially inverted sugar, which is made by heating up table sugar and a little acid (like citric acid or lemon juice) along with a little water until a hard crack.  This process caramelizes the sugar and breaks down the Sucrose (table sugar) into Glucose and Fructose, which make a much better product in brewing.

Jim Stirring Wort
Check out the size of this Pot!  I got this 25 gallon stock pot at Bass Pro for a $129 (amazing price) and is the first time I've had something that can handle a volume recipe.  The biggest challenge of the day was the amount of time it took to heat up 25 gallons of liquid to a boil, even with the jet engine coming out of the turkey fryer.  Once the wort got going it was just over an hour boiling with the hops and then the wort chiller went in.  That worked surprisingly well given the volume it had to cool (I wish I had a picture of that process).  There are a number of things that happen during the boil. Most importantly, the oils from the hop leaves are released into the wort, providing the bitterness that balances out the sweet flavor of the malt.  The finish hops are added at the last minute so the more volatile aroma oils don't boil off.  The second major process is that the proteins that were extracted from the grains begin to solidify and clump up.  When you cool the mash down quickly and let it sit, these solids drop to the bottom of the pot, where they are left behind, ensuring a cleaner looking and tasting beer.

Trub - this stuff is yuck
After this it was off to the fermenter for the first batch at around 11:00.  The final reading on the hygrometer was 1.065 (after I watered it down a bit), which is a 9% potential alcohol.  At kegging another reading will be made to get the actual alcohol content, but I expect about 7% in the final product.

When the second batch finally approached a boil I happened to look at the clock and realized I'd be up til 4am.  That one sat until the next day and my daughter and I did all the cleanup work while that was going.  Next time around I think I'll split the process into two days - the first day for the mash and the second for the boil process.  I also need to consider another stockpot given the amount of waiting time on heating up the liquids.

The pigs feasted on the spent mash over the next couple days and my goodness what a reaction they had.  For days after, every time I would walk by the pens they would squeal like a three year old on Christmas morning.  What a great way to use waste.